Tuesday, October 29, 2013

Cauliflower Crust Pizza


The boys and my husband are all big fans of our "homemade" pizza.  We usually make 2 large very thin crust pizzas and for the most part it all disappears.  I was looking for an alternative to pizza night because for some reason the dough we use (not really homemade, it comes from the refrigerated section at the grocery store) hasn't been agreeing with me the last few times we have made the pizza.  I found this recipe on my Beachbody coach's blog and thought I would give it a try.

Serves 2
Ingredients
  • 1 cup cooked, riced cauliflower
  • 1 cup shredded mozzarella cheese
  • 1 egg, beaten
  • 1 teaspoon dried oregano (I used Italian seasoning)
  • ½ teaspoon crushed garlic
  • ½ teaspoon garlic salt
  • olive oil (optional) 
  • pizza sauce, shredded cheese and choice of your toppings
1) Rice the cauliflower: Take 1 large head of fresh cauliflower, remove stems and leaves, and chop the florets into chunks. Add to food processor and pulse until it looks like grain. Do not over-do pulse or you will puree it. (If you don't have a food processor, you can grate the whole head with a cheese grater - I tried this at first and do not recommend it.  It was really hard and I just made a huge mess). Place the riced cauliflower into a microwave safe bowl and microwave for 8 minutes. There is no need to add water. One large head should produce approximately 3 cups of riced cauliflower. The remainder can be used to make additional pizza crusts immediately, or can be stored in the refrigerator for up to one week.

2) Preheat oven to 450 degrees. Spray a cookie sheet with non-stick cooking spray.
3) In a medium bowl, stir together 1 cup cauliflower, egg and mozzarella. 
4) Add oregano, crushed garlic and garlic salt, stir. 
5) Transfer to a cookie sheet (I do not recommend using an "air bake" style of cookie sheet), and using your hands, pat out into a 9" round. Optional: Brush olive oil over top of mixture to help with browning.


6) Bake at 450 degrees for 15 minutes.  Remove from oven.
7) Add sauce, toppings (need to be pre-cooked) and cheese. 


8) Place under a broiler at high heat just until cheese is melted (approximately 3-4 minutes).

This turned out well, with the exception of the fact it didn't really crisp up in the middle.  I think this was due to the type of cookie sheet I used.  Next time I will use a dark non "air bake" style sheet, or maybe I will use our pizza pans and put a cookie sheet on the rack below.  Our pans have holes in them and as the crust bakes some of the liquid from the cauliflower comes out so if you have "holy" pans you will want to put something under it.  I just used mushrooms this time because that was about all I had left by the end of the week.  Next time I will definitely load up the veggies on there - probably peppers, onions, mushrooms, olives, maybe some tomato....  Remember to cook your toppings before you top your pizza.  3-4 minutes under the broiler is just to melt the cheese and not meant to cook the toppings.  I will make this again, probably on our next pizza night and add a side salad as well.  Remember, this serves TWO.  I ate almost the whole pizza in 1 sitting!  Next time I will be sure to watch my portions.  

What are your favorite pizza toppings?


Sunday, October 20, 2013

Baked Apple Cinnamon Oatmeal

This recipe is great for a breakfast, a brunch, or a mid-morning snack.  It makes enough to provide you with a week's worth of breakfasts or will cover breakfast for the family for two days.  I have been using this for a mid morning or pre 5K training snack.


2 cups Old Fashioned rolled oats
3 Tbsp maple syrup
3 Tbsp slivered almonds (you could use whatever nuts you like or even omit them if you want)
1/4 cup craisins (you could use another dried fruit such as raisins)
2 cups coarsely chopped diced apples (I used Golden Delicious)
2 cups milk (I used skim but you could use almond milk or any type of milk I would think)
3 eggs
1/2 tsp vanilla extract
1/2 tsp cinnamon
1/4 tsp allspice
3/4 tsp salt

Preheat your oven to 325 degrees.  Mix your oats, apples, nuts, and dried fruit all in a large bowl. Then in another bowl, whisk your eggs, milk, maple syrup and spices. Pour over your oatmeal mixture and gently stir.

Pour the mixture into a baking dish.  I used a 9x11 size; and bake at 325 for about an hour, or until golden brown.


This is really good served warm out of the oven.  It will also set up when it cools and can be stored covered in the fridge and microwaved for breakfast later in the week.


Friday, October 18, 2013

Black Bean Brownies


I know, black bean brownies?? Really?  Yes, I say really!  This is another recipe I got from the chocolatecoveredkatie.com blog - I have to warn you as I did last time, this blog makes me want dessert every time I go there.  This recipe turned out great.  The boys and my husband all loved these and had seconds.  This was even AFTER I told them there were black beans in there!  I brought the 2 remaining brownies to work and shared them with my coworkers and they were a hit at work too.  So without further ado..... black bean brownies!


  • 1 1/2 cups black beans (1 15-oz can, drained and rinsed very well)
  • 2 tbsp cocoa powder- dutch or regular  (add a little extra if desired)
  • 1/2 cup quick oats
  • 1/4 tsp salt
  • 1/3 cup pure maple syrup (Honey will work, I used the maple syrup we got from our trip to Montreal this past summer)
  • 2 tbsp sugar (or omit and increase maple syrup to 1/2 cup - next time I will probably increase the maple syrup instead of using sugar)
  • 1/4 cup coconut or vegetable oil (I used the vegetable oil, but I would like to try these with applesauce instead.)
  • 2 tsp pure vanilla extract
  • 1/2 tsp baking powder
  • 1/2 cup to 2/3 cup chocolate chips (the original recipe says: Not optional. Omit at your own risk.  I used the 1/2 cup and honestly I think you could get away with even less)
  • optional: more chips, for presentation (I didn't use extra)

Black Bean Brownies Recipe: Preheat oven to 350 F. Combine all ingredients except chips in a good food processor, and blend until completely smooth. Really blend well. (The original recipe indicated that "a blender can work if you absolutely must, but the texture—and even the taste—will be much better in a food processor".  I used a blender and blended for several minutes and it didn't seem to matter to the people that ate them.) Stir in the chips, then pour into a greased 8×8 pan. Cook the black bean brownies 15-18 minutes, then let cool at least 10 minutes before trying to cut. Makes 9-12 brownies.  I cut them into 12 pieces.  I also cooked them for the full 18 minutes and think maybe they could have been cooked a little longer.  These came out really fudgy and they don't rise or have a brownie like texture, so if you are funny about food texture these might not be for you.  I had only 1 because they were rich enough that was all I needed.  The boys on the other hand had anywhere from 2 to 4!

Wednesday, October 16, 2013

10 Tips to Keep You on Track Through the Fall/Holiday Season


What is your favorite time of the year?  I love fall, the changing leaves, the sporting events, the pumpkin everything.... a few things though I could do without – the shorter days, the cooler weather, the homework and the jam packed schedule, the hibernation instinct that kicks in.  I find these things add up to make this time of year one that can cause my healthy eating and exercise habits to slip. We all have to go through these “seasonal lifestyle adjustments” so here are 10 ways to keep things on track as you transition through the last part of the year.
(As taken from Steve Edwards Nutrition Tips).


1. Schedule your exercise                                                                                                                   One of the most difficult adjustments to make during the fall is getting used to less daylight. As the days shorten, it seems as if you've got fewer hours during which to schedule your activities. When you come home from work in the dark, it hurts your psyche. And it's tough to believe that 7:00 PM is really no different than it was during July, when you still had 2 hours of daylight left. Then there's the cold factor. Even if you work out indoors, it's so much easier to get back under your warm covers or bundle up and sit in front of a fire or the TV than it is to force a workout. Just remember that exercising makes you warm. It also keeps you fit and healthy and is the best thing you can do with cold and flu season right around the corner. Schedule your daily workout like it's part of your job, and stick to it.
 
2. Schedule your sleep                                                                                                                          As our days get busier, we tend to push projects later and later into the evening. To fuel those longer hours we eat...and eat. This is one major cause of the freshman 15: the infamous all-nighter. A recent study showed that when doctors are doing their residencies and are forced to work extremely long hours, famously foregoing sleep in the process, they each gain an average of more than 20 pounds. As available daylight decreases, it's common to find yourself making alterations in your daily schedule, with sleep often losing out, so schedule your sleep just like you do your work and exercise.
3. Plan your meals
Plan your weekly meals ahead of time so you don't resort to unhealthy "convenience" foods. If your schedule is insane during the week, try taking an hour or two on Sunday to shop and strategize. Put healthy meal and snack options in your car, your office, your backpack, or anywhere you're likely to find yourself hungry. Trust me, the energy you get on the back end of this planning will far exceed the time it takes to plan, especially when you consider how you'll feel if your diet is fueled by fast food.


4. Carry water everywhere
When we're busy, we'll often forget to drink water, especially as the weather cools off. Then, in this dehydrated state, we often confuse thirst for hunger, and we eat. You can avoid this by making sure there's water everywhere you go. Carry a water bottle and refill it at every opportunity. Have an extra bottle in your car, your backpack, at your desk, etc., and behave as if you're in a race each day. Force yourself to drink a glass of water every hour that you're working or studying.


5. Be realistic about alcohol
Another big contributor to holiday weight gain, alcohol, is very high in calories (7 calories per gram) and very low in nutritional value. Every drink you consume is about 200 calories of nutrition that you aren't getting from your diet, or that you're consuming additional calories—overeating—to replace. And this is before we consider the calories you need to consume getting rid of a hangover. If you're a drinker, you'll never be faced with more temptation than during the fall and holidays with tailgating, office parties, and family gatherings. So plan for it. Prior to the event, consider the number of drinks you want to allow yourself and stick to it. Another helpful tip is to carry that water bottle with you socially as well and drink a bottle for every cocktail you have. This will help fill you up so you aren't drinking alcohol to quench your thirst, which happens often at social events. Drinking that water will also keep you hydrated and minimize the effects of a hangover.

6. Plan for parties
Parties happen—and there's not much you can do about it. Even if you aren't social, the party will find you. Many offices are like the one in that Seinfeld episode where the coworkers find any excuse to celebrate, usually with cake or other sugary treats. And with fall comes many such opportunities to indulge. Beginning with Oktoberfest, you'll find a relentless stream of perfectly good excuses to ruin your health that lasts right through New Year's. Plan ahead and decide just which occasions will be worth the indulgence. That way you'll be fully armed with reasons when your coworkers start bringing in all those home baked goodies.


7. Begin a morning ritual
One of the easiest ways to live a healthy lifestyle is to begin each day by doing something positive. During the summer, we often let this slide because, well, we can. With long warm days to look forward to, there always seems to be time to do something energetic. As the days shorten, making the effort to be healthier takes more discipline. Beginning each day with something healthy, even something as brief as a 5-minute ritual of breathing deeply, stretching, and thinking about positive things you want to accomplish with your day, can give you a whole new outlook.

8. Find a healthy nighttime ritual
Many of us undo an entire day's productivity in the last few hours before bed. This is particularly true when we're busy and/or stressed because we want to unwind, which often means cocktails and/or desserts in front of the TV. If you can find a healthier way to unwind, you'll do yourself a world of good. And even if you can't get away from the cocktail/dessert/TV habit, adding something at its end, instead of just sacking out, can reverse much of the damage. Stretching in front of the TV is one of the easiest ways to make that transition. Following up your stretching with herbal tea and some relaxing reading can have you hitting the sack with a much more positive attitude.

9. Make a positive New Year's resolution now
Instead of waiting until New Year's to undo and repair the damage caused by a fall-into-winter slide away from your fitness goals, make a resolution to get there, starting today, with improved fitness and health. Just think about how much better your goals can be for next year if you finish this year on a positive note. Why put yourself through the work of digging yourself out of a hole you make deeper from now through the end of the year? Instead, set yourself up, beginning right now, to have a banner New Year.


10. Cut yourself some slack
You can't be perfect, and, frankly, who wants to be? You've got to live. By planning ahead with goals in mind, you'll be far more able to relax about the holiday season, and maybe even enjoy it a little too. So make a plan and do your best to stick with it, but don't forget to make enjoying the season and having some fun part of that plan.

Sunday, October 6, 2013

Focus T25 Final Results and Beta Review

I finished T25 Beta and as promised here is my review and my final results.  First off I just want to say I AM DONE!!!!  10 weeks of T25 complete, 10 weeks of burpee madness, core work, fast moves, something that looks like dancing, and A LOT of sweat.  It is hard to believe that 10 weeks has gone by already.  That was really quick, and it just reminds me that even if I am not working towards my health and fitness goals - time will pass anyway.  Time does not care if I am working out every day, time does not care if I am eating healthy and drinking my Shakeology.  Time will march on with or without me and I have to choose if I want to be better over time or if I just want to let time take its toll.  I am really glad I decided 10 weeks ago to take on the T25 program and to not let time pass me by.


On to the review.  If you would like to see my review from Alpha Phase, you can find it here.  Beta Phase is laid out basically the same way as Alpha, but the DVD's are different.  You do one 25 minute workout 4 days a week, a double day on Friday (so two 25 minute workouts), and a 25 minute stretch on Sunday.  If you aren't up to the double you can do one workout on Friday and one on Saturday to split it up.  Tania is the modifier for this phase as well, and she still sweats and gets a great workout just like everyone else.  The workouts are  Core Cardio, Speed 2.0, Rip't Circuit, Dynamic Core, and Upper Focus.  The first week happens in that order but over the course of the 5 weeks of Beta phase, these workouts will rotate and you will do different DVDs on different days with different doubles on Friday.  No 2 weeks are the same which is nice.  Even though you are rotating through the same 5 workouts each week, it doesn't get boring because you change the order each week.  Also, since the workouts are only 25 minutes it goes by so fast you don't have time to get bored.  However, there are cool downs after each workout which run between 2 and 3.5 minutes as well as a disclaimer at the beginning of each DVD that you can't skip through. When all is said and done you actually put in close to 30 minutes. 


CORE CARDIO


This workout is another series of progressive moves starting with switch kicks - low, double, high; then uppercuts stationary and jack feet.  Throw in some twisting "x" lunges starting high and working all the way to the floor with a few sets of squats for good measure and by the time the first 7 minutes are done you will be a sweaty mess.  Then things get crazy with some air plank jumps right before heading into the "burnout". The super fast repetition of all the hardest moves you just did.  


After the first burnout you have about 8 minutes of hopping, twisting, kicking, shuffling, squatting..... and oh yeah - burpees!  Like you'd get away without those.  Some planking is thrown in for good measure before the second burnout.  The workout ends with some floor sprints and then up to full body sprints.  This was another great workout and I felt like I was in Beta Phase.  The Alpha phase was a good base and definitely helped prepare me for this Beta cardio.  Not my favorite of all the workouts in Beta but a good one.

SPEED 2.0


This is by far my favorite workout of all the workouts so far.  It makes me excited to see what Speed 3.0 will be like in Gamma.  This workout consists of 2 levels with about 8 moves in each level.  You repeat the 2 levels 3 times each, and then you go through the entire workout from the top twice increasing speed and decreasing the number of times for each move.  I love the music, I love the moves, I love that Shaun T sing songs everything while he is doing the moves in time to the music.  This workout just gets me motivated!  Some of the moves include switch kicks, zigzags, squat hops, uppercuts, knee raises.... the list goes on.  There is quite a bit of fast footwork in this workout and my calves and sometimes feet would feel like they were going to catch fire.  Maybe I love this one so much because there are NO BURPEES!!!


RIP'T CIRCUIT

I was very afraid of this workout.  I mean, just look what it is called.  I figured if it was worse than Total Body Circuit from Alpha phase I was in big trouble.  The one thing that I was looking forward to though was the use of weights (finally)!  I love strength training and after 5 weeks without any weights I was ready to pump some iron!  I used 8 pound weights and trust me, for me that was plenty.  If you don't have weights that is ok because the program comes with a resistance band.  


You can get results with the band just like you can with the weights (if you look closely you can see Andy the band guy in the back row).  This is a total body workout, some cardio, some upper body, some lower body and some ab work.  Pretty much in that order.  Probably the best thing about this workout is no burnout and the worst thing about this workout is the air plank to single leg burpees..... WHAT IS THIS MADNESS??


I didn't hate this workout as much as I hated Alpha Total Body Circuit, maybe because of the weights or maybe because of the lack of one thousand burpees.  Overall this was great and didn't make me dread seeing it come up on the calendar each week - even the 3 times I had to do it in week 5.

DYNAMIC CORE


 The above picture is from the warm up for this DVD.  It starts with a brief cardio warm up and then moves into standing ab work mixed with cardio including some twists, kicks, and tuck jumps.  The focus is to keep your abs tight throughout all the standing work.  Close to halfway in to the workout you move to the floor work.  This includes crunches, planks, V holds, hip ups... the list goes on.  This was HARD.  I had to take several breaks during some of the V hold work.  But, so did this guy so I didn't fell so bad.


Notice how he is gripping the mat, Shaun T even let him have a second or two break.  The end of this workout was what Shaun T calls a plank walk squat pyramid.... yeah those are BURPEES!!!  Again with the tricky names.  A burpee by any other name is still a burpee Shaun T.  I definitely felt this workout later in the day.  I kept thinking maybe I was getting sick, a stomach bug or something but then I remembered - no it is just my abs burning like the fire of the sun.
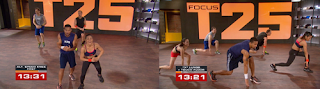
UPPER FOCUS

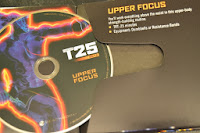
The opposite of Alpha's Lower Focus comes the Beta round's Upper Focus.  Again, weights or bands are involved with this workout which makes me love it.  This workout was accurately named as the majority of the DVD included upper body work.  Some cardio was involved in the warm up and a few other moves spaced throughout the workout.  The upper focus included standing work such as shoulder presses, front and lateral raises, jabs, and upright rows.  Floor work included chest flys, tricep dips, and hip ups.  This workout was probably the easiest of all the DVDs, that's not saying it was easy though.  I definitely felt this later in the day and even the next day.  Both bands and weights can be used.


All workouts end with a 2-3 minute stretch depending on the day.  A Stretch DVD is also included to be done on Sunday.  25 minutes of well deserved relaxing and recovering the body.  This workout can be done  more than just 1 day if you feel you need more of a cool down or stretch. 

I really liked Beta phase of T25.  As I said I am a huge fan of strength training and I had missed it for the first 5 weeks of Alpha phase.  I didn't necessarily feel Beta was that much harder than Alpha.  My guess is because Alpha was such a shock to my system and it really did give me a great foundation for Beta.  I still felt like I got a great workout in only 25 minutes.  Here are my results for the total program: in 10 weeks, using the T25 program, drinking Shakeology, and making an effort to follow my weekly meal plan...... I lost 10 pounds and 14.25 inches!  


I am really super happy with those results.  I mean 25 minutes a day?  10 weeks, 10 pounds and 14+ inches??  It goes to show that you really CAN get results in just 25 minutes a day.  I am also really proud of myself for actually completing the workout.  So what's next?  Gamma phase!  Four more weeks of 25 minutes a day with Shaun T and even more strength training.  I can't wait!

If you would like to try T25 and join my next fitness and healthy eating accountability group, leave a comment below or visit www.beachbodycoach.com/ashleywrobbins to have me assigned as your coach so we can start creating a customized fitness program to meet your needs!  If you have more questions, email me at fitfamilyrobbins@beachbodycoach.com - I'd love to help you reach your goals!